Material Modding
You can add your own textures to be used as wall and floor materials in the game.
The game will take all the default and your supplied textures and put them in 3 huge texture atlasses, which the game then maps walls and floors to. Note that how many materials you can have in the game depends on the maximum size of textures your GPU supports. If your GPU supports 4k textures, you can have a maximum of (4096^2)/(256^2)=256 materials. This also means additional materials only adds to the loading time of the game and won't affect in-game performance, as all building floors and walls are drawn in 1 single draw call (player chosen colors are also mapped to a global color texture).
Material mod structure
Main structure
You can add your own materials to the game by creating a new folder inside the Materials folder in the root of the game.
Inside your new folder you should add a "materials.xml" file and all your textures as 256x256 png files. The root tag of the xml file should be named after the name of your material pack. Each child tag constitutes a new material.
Materials
Each material will be named as its tag. The player will never see this name, but the game uses it for serialization purposes, so you should make the name as unique as possible to avoid overlap. If a material is named the same as another one, it will replace it, which you can use to replace in-game materials.
Each material should have sub tags defining its Category, either Floor, Interior, Exterior, Roof or Path, optional paths to its "Base", "Bump" and "Extra" textures and optionally a Skirting tag which you can use to remove skirtings on interior wall materials using <Skirting>False</Skirting>.
As of Alpha 10.4.4, you can add an optional FloorType tag to floor materials, with the value set to either Wood, Ceramic, Carpet(default) or Concrete, which changes which footstep sound effects to use when employees walk over the floor.
Material textures
Materials consist of:
- Base texture, which is a texture that can be colored by the player. This should be grayscale most of the time, as the player chosen color will be applied directly by multiplying it, except as noted for the Extra texture.
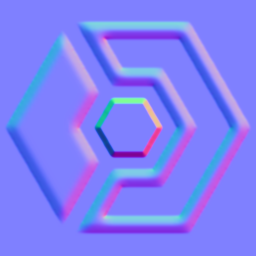
- Bump texture, which is the normal map. These are usually purple, signifying a direction pointing along the normal of the surface.
- Extra texture. The material uses the 4 color channels of the extra texture to modify the material.
- The red channel controls occlusion, i.e. how dark a material appears, even in direct light, to simulate crevices.
- The green channel controls smoothness/specularity, where 100% green means very shiny.
- The blue channel controls color masking, where 100% blue means the player's color will be 100% multiplied with the base texture color and 0% means the material will only use the base texture color. An example of using the blue channel of the Extra texture would be to add gold adornments to a wall that the player can't change the color of.
- As of Alpha 10.10, the alpha channel of the Extra texture controls snow and rain. 100% alpha means no snow or rain, 50% alpha means 100% snow and about 50% rain and 0% alpha means 100% rain. So from 100% alpha to 0% you get nothing -> fully snowed and a little rain -> completely wet. If you are using Photoshop, it is recommended that you add the alpha channel as a new channel and save your texture using the SuperPNG plugin to avoid alpha channel corruption.
XML example
<CoolPack>
	<CoredumpingBestWall>
		<Category>Interior</Category>
		<Base>base.png</Base>
		<Bump>bump.png</Bump>
		<Extra>extra.png</Extra>
		<Skirting>False</Skirting>
	</CoredumpingBestWall>
	<CoredumpingBestFloor>
		<Category>Floor</Category>
		<Base>base.png</Base>
		<Bump>bump.png</Bump>
		<Extra>extra.png</Extra>
		<FloorType>Ceramic</FloorType>
	</CoredumpingBestFloor>
</CoolPack>


